Kitchen Remodel Planning: How One Small Space Sparked a Smarter Design
For the past 9 years, our kitchen has worked really well for us.
It had great storage for our two-adult household.
The layout made sense.
So even though I’d thought about updating it aesthetically, it never felt like a priority.
Until recently.
The One Small Kitchen Area That Wasn’t Working
There was one area that never quite pulled its weight:
a built-in desk nook
narrow upper cabinets
an oversized wine rack with crisscross dividers
We didn’t use it as a desk.
The upper cabinets weren’t very functional.
And the wine rack left a lot of space unused—wine bottles didn’t even fit in many of the slots.
It wasn’t a huge portion of the kitchen—but it was enough to notice.
With a baby on the way, that underused area started to feel like a real opportunity.
And timing-wise, we realized:
It was either now…
or many years from now
Because living through a kitchen remodel with a newborn? Hard pass 😅
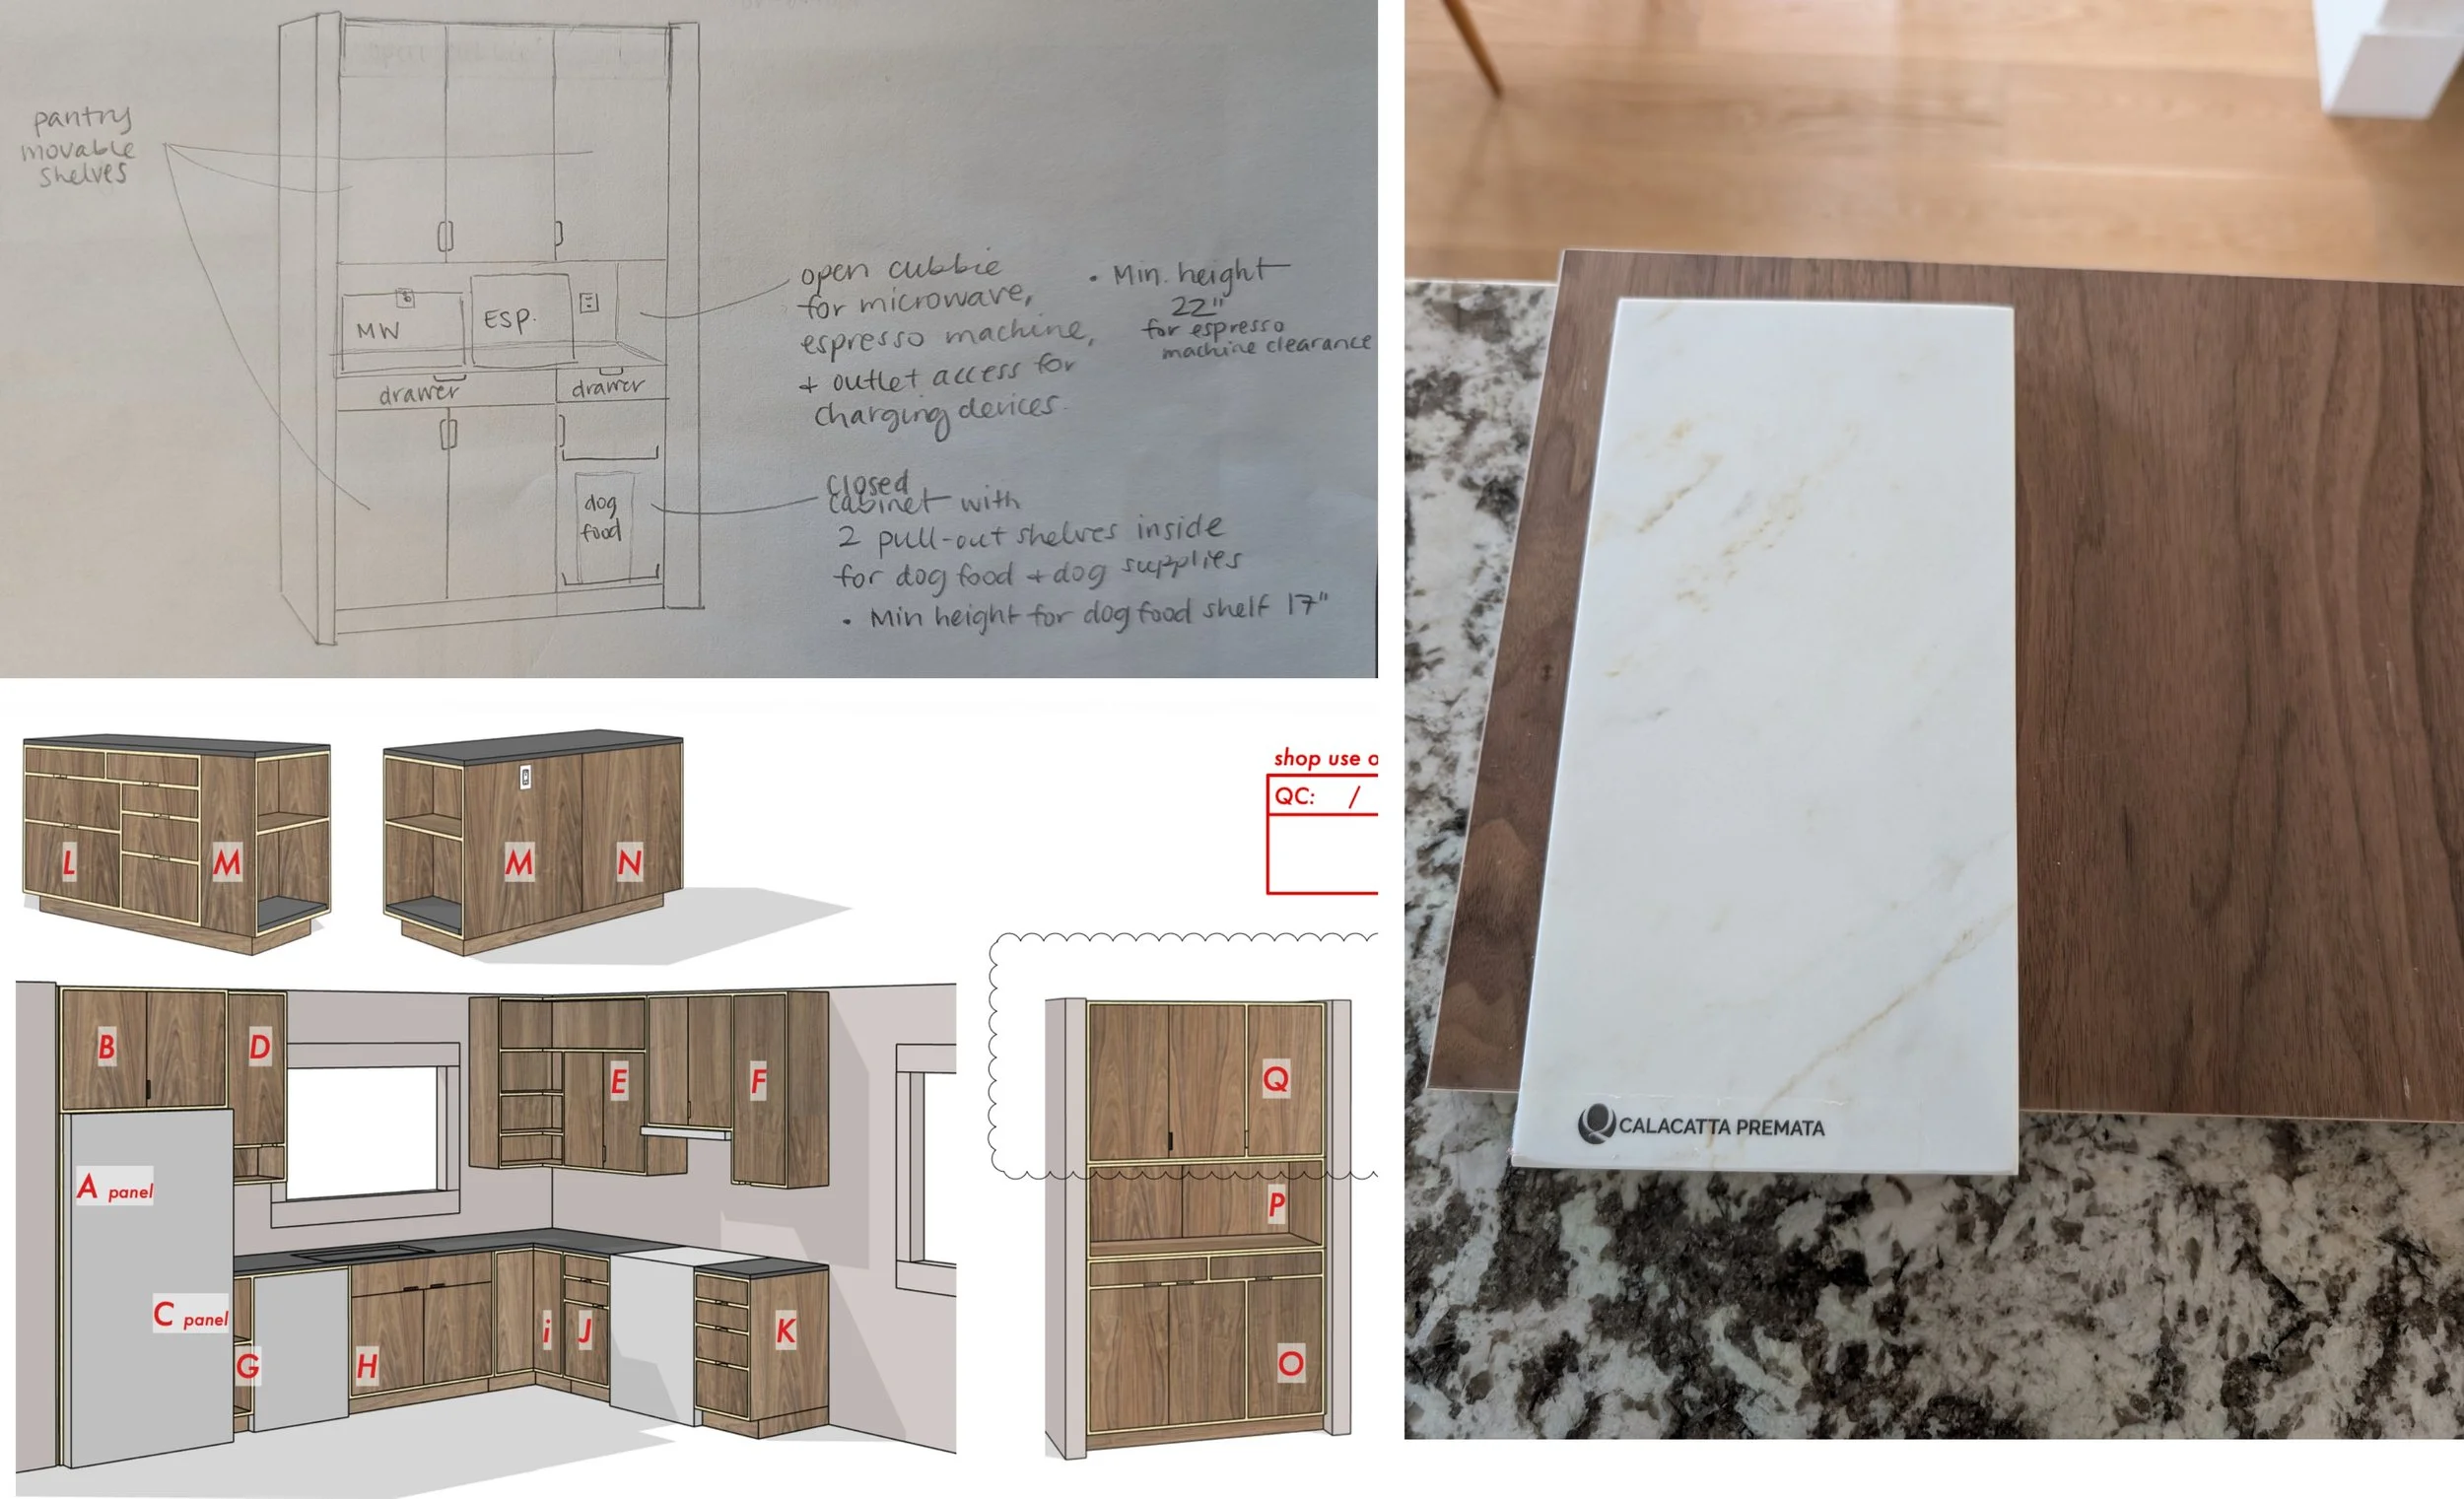
Step 1: Define What Your Kitchen Needs to Do
Before thinking about finishes, I started with function.
Here were our priorities:
Replace the desk nook with a floor-to-ceiling pantry
Add a dog food station with storage for a large bin
Keep our existing layout (it already worked well)
Choose easy-to-clean countertops and backsplash
Keep our large single-basin sink (non-negotiable)
Add some built-in organization—but keep it flexible
Upgrade the cabinet aesthetic
Complete the project before baby arrives
This step is everything. A beautiful kitchen that doesn’t function well will always fall short.
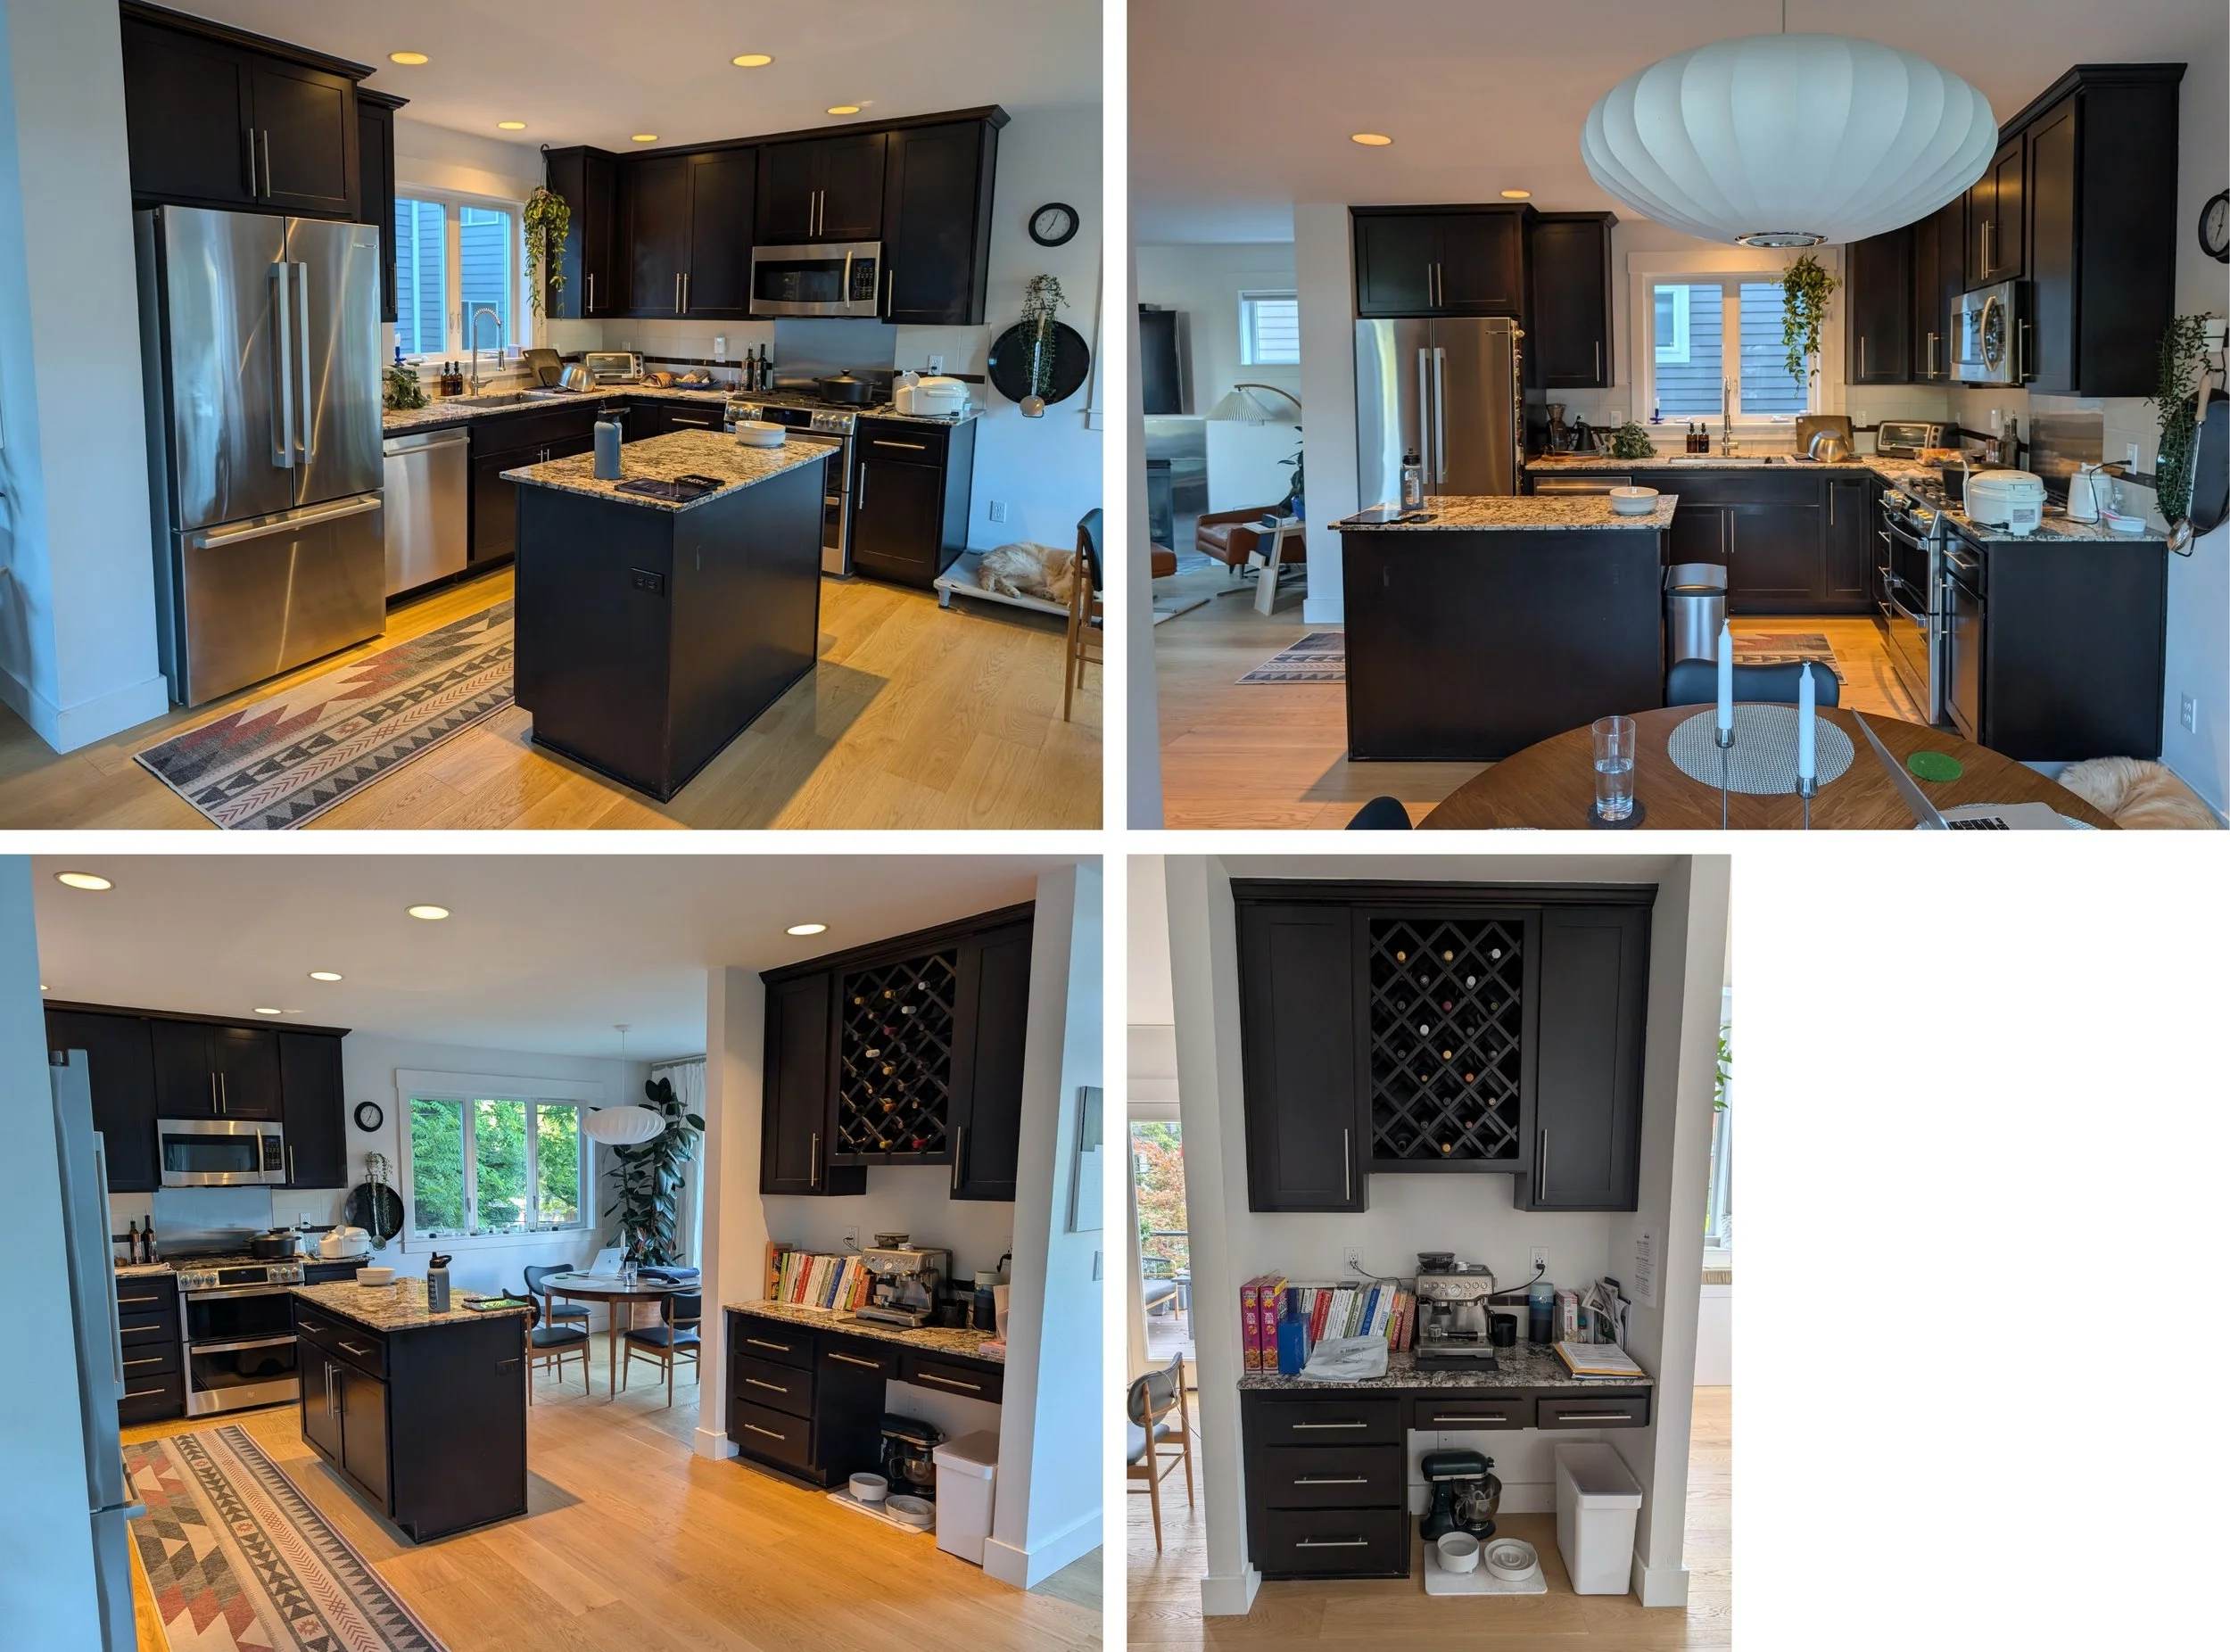
BEFORE: Our previous kitchen
Step 2: Gather Kitchen Design Inspiration
Before finalizing decisions, I collected inspiration to refine the overall direction.
Some themes that kept coming up:
Mid-tone wood cabinetry
A small amount of open shelving (not too much)
A modern / mid-century aesthetic
This helped guide decisions later so everything felt cohesive—not pieced together.
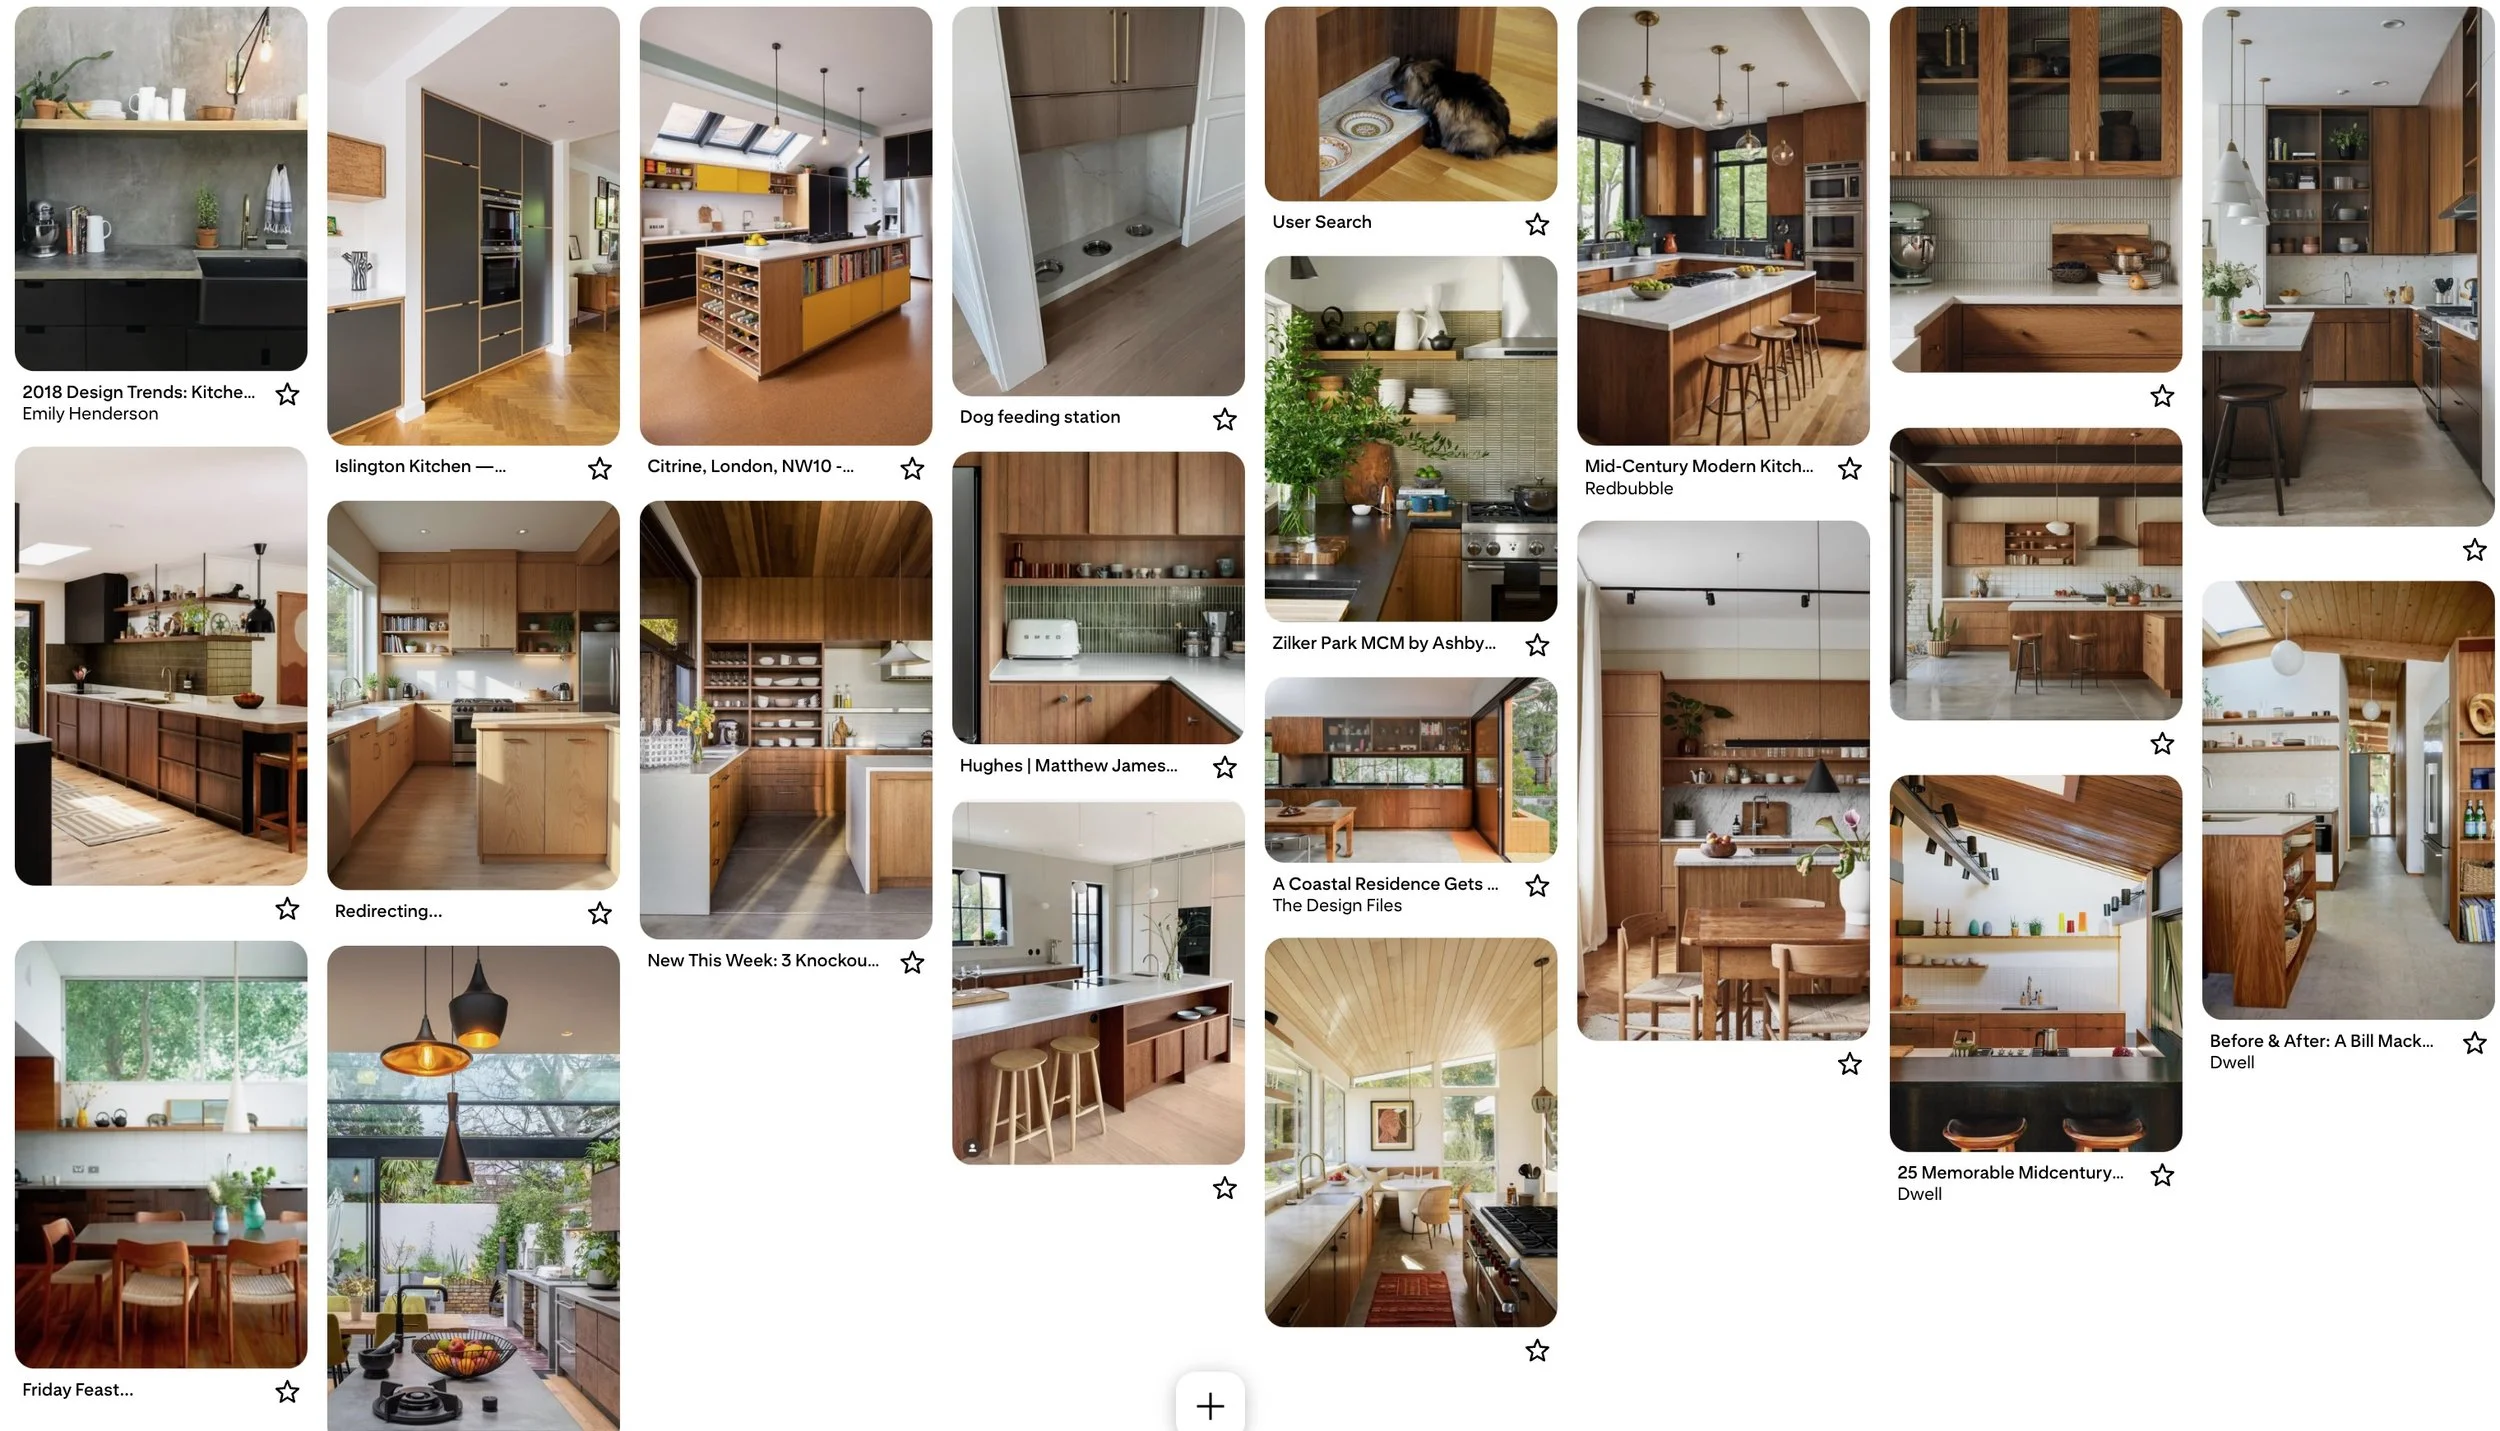
Some of my inspiration pictures
Step 3: Reality Check Your Budget and Timeline
We initially explored hiring a design-build firm, thinking it would streamline the process.
But:
Quotes came in at about 2x our expected budget
Timelines couldn’t meet our deadline
This was in October—and we needed everything done before April.
So we took a step back.
Key realization:
This project wasn’t as complex as it sounded.
No structural changes
No plumbing or electrical updates
At its core, we were replacing cabinets and countertops.
Step 4: Simplify the Kitchen Remodel Process
Instead of going the full design-build route, we decided to manage the project ourselves.
Here’s what that looked like:
Partnering with a trusted builder for installation
Designing the layout ourselves
Ordering custom cabinets through a local Seattle company (KERF Design)
The cabinets were:
High quality (no compromise there)
Reasonably priced
Ready in just 2.5 weeks
Even better, their in-house designer helped finalize every dimension—so everything was tailored to how we actually use our kitchen.
Choosing countertops (the easy way)
For countertops, we kept things simple:
Went to a showroom
Picked the one we loved
Done
No overthinking required.
The Biggest Kitchen Design Lesson
You don’t need more square footage to make your kitchen work beautifully.
Often, it’s the small, overlooked areas—the ones that feel awkward or underused—that reveal where your space isn’t fully supporting you.
For us, noticing one niche led to a bigger project.
But the insight applies at any scale.
When you take a closer look at how a space is (or isn’t) working, even a small change can make a meaningful difference in your day-to-day life.
A Simple Prompt for Your Own Home
Is there a small space in your home that’s not quite pulling its weight—but you’ve just been living with it?
Not everything needs fixing.
But sometimes, a small tweak is all it takes to make a space feel so much better.
What’s Next
In Part 2, I’ll share how the final kitchen design came together—and what worked (and didn’t) once it moved from plan to reality.
Want more tips like this?
Sign up for my newsletter where I share real-life organizing projects, gentle mindset shifts, and tools I swear by.